Running HiveMind Player on ArkOS with the R36S

JarbasAl
OVOS Contributor

Running HiveMind Player on ArkOS with the R36S
The R36S handheld from AliExpress is usually marketed as a retro gaming device, but with a bit of tinkering it can also become a HiveMind-powered audio player, fully integrated with Home Assistant and Music Assistant 🎶.
This guide shows how I set up the hivemind-player on ArkOS and turned my device into a smart media endpoint.

Why HiveMind Player?
HiveMind Player lets you run the Open Voice OS (OVOS) audio stack as a service. Once configured, your R36S:
- Appears as a media player in Home Assistant 🏡
- Works seamlessly with Music Assistant 🎵
- Uses OpenVoiceOS for playback control (play, pause, next, etc.)
- Can handle TTS and system volume if you install the right plugins
See the HiveMind Media Player README for full technical details.
Step 1: Flash ArkOS
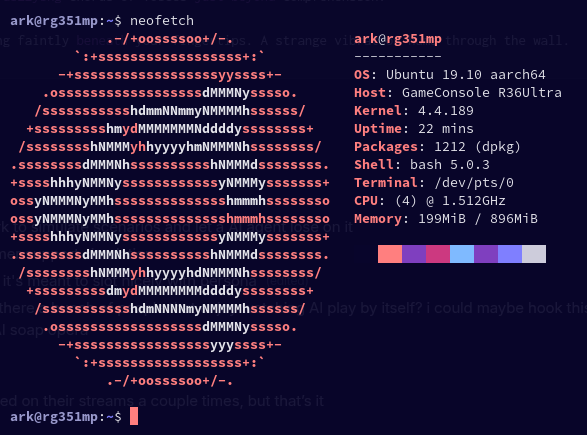
I used arkos4clone to install ArkOS on my R36 Ultra.
⚠️ Compatibility and initial steps may vary across clone devices, since there are many hardware variations. This guide applies to ArkOS-based firmware but assumes your handheld is already fully functional before starting.
👉 Always follow the specific instructions from your image provider, and check handhelds.wiki for the latest community documentation.
Once ArkOS is up:
- Connect to WiFi from the device menu
- Enable Remote Services
- SSH into the device from a computer
Step 2: Install uv
We’ll use uv for managing Python environments and dependencies:
curl -LsSf https://astral.sh/uv/install.sh | sh
Create a Python 3.10 virtual environment:
uv venv --python 3.10
Step 3: Install System Packages
ArkOS strips out many development headers, so we need to reinstall them.
Without these, I ran into some confusing build errors when trying to install plugins for volume control, including:
fatal error: limits.h: No such file or directory
fatal error: linux/limits.h: No such file or directory
fatal error: alsa/asoundlib.h: No such file or directory
These were resolved by reinstalling the right dev packages:
sudo apt install build-essential libffi-dev libssl-dev gcc libc6-dev
sudo apt install --reinstall libc6-dev linux-libc-dev libasound2-dev
Then install Python build tools:
uv pip install wheel
Step 4: Install HiveMind Player
Install the player with recommended extras (e.g., VLC, PHAL, OCP, TTS):
uv pip install git+https://github.com/JarbasHiveMind/hivemind-media-player[extras]
Step 5: Configure HiveMind Core
Create a config directory and set up the server.json:
mkdir -p ~/.config/hivemind-core/
nano ~/.config/hivemind-core/server.json
Example minimal configuration:
{
  "agent_protocol": {
    "module": "hivemind-player-agent-plugin",
    "hivemind-player-agent-plugin": {}
  },
  "network_protocol": {
    "hivemind-websocket-plugin": {
      "host": "0.0.0.0",
      "port": 5678
    },
    "hivemind-http-plugin": {
      "host": "0.0.0.0",
      "port": 5679
    }
  }
}
Step 6: Extra Plugins
You may want to install PHAL plugins for platform and hardware integration, or TTS plugins to use different voices
Currently the most useful is the ALSA plugin for system volume control:
uv pip install ovos-tts-plugin-piper ovos-phal-plugin-alsa ovos-PHAL-plugin-system
This makes volume adjustable via HiveMind / Home Assistant.
👉 PHAL is optional. Right now it’s only needed for volume control - and, as shown above, it required a lot of dev headers just to build. In the future, dedicated plugins may appear, for example to control the joystick LEDs on the R36 Ultra.
Step 7: Configure ovos-audio
HiveMind Player uses the OVOS audio stack for playback and TTS. The configuration lives in:
~/.config/mycroft/mycroft.conf
The main change required on ArkOS is adjusting the WAV playback command:
- By default,
mycroft.confusespaplay - On ArkOS, this needs to be switched to
aplayin order for TTS to work correctly
{
  "play_wav_cmdline": "aplay %1",
  "play_mp3_cmdline": "mpg123 %1",
  "play_ogg_cmdline": "ogg123 -q %1",

  "tts": {
    "module": "ovos-tts-plugin-piper",
    "ovos-tts-plugin-piper": {"voice": "alan-low"}
  },

  "Audio": {
    "backends": {
      "vlc": {
        "type": "vlc",
        "active": true,
        "initial_volume": 100,
        "low_volume": 50
      }
    }
  },

  "PHAL": {
    "ovos-PHAL-plugin-alsa": {
      "default_volume": 90
    },
    "ovos-PHAL-plugin-system": {
      "core_service": "hivemind-player.service",
      "ssh_service": "ssh.service",
      "sudo": true
    }
  }
}
- play_wav_cmdline → must be changed to
aplay %1 - Audio → VLC is already available in ArkOS and can play nearly all streams you throw at it
- TTS → Default is
ovos-tts-plugin-piper, but you can swap in any OVOS TTS plugin you prefer such asovos-tts-plugin-server - PHAL → system plugin needs to be adjusted in order to use the correct service names
NOTE: in arkOS sudo does not require password, therefore
ovos-PHAL-plugin-systemshould work out of the box
Step 8: Set Up Permissions
HiveMind operates on a deny-all policy by default: every message type must be explicitly allowed for clients.
First, create a client identity:
hivemind-core add-client
This gives you an Access Key and Password.
Next, allow the minimum messages needed for playback and TTS. Replace <NODE_ID> with the client’s Node ID:
# Basic audio / TTS
hivemind-core allow-msg "speak" <NODE_ID>
hivemind-core allow-msg "mycroft.audio.is_alive" <NODE_ID>
hivemind-core allow-msg "mycroft.audio.is_ready" <NODE_ID>
hivemind-core allow-msg "mycroft.audio.speak.status" <NODE_ID>
hivemind-core allow-msg "mycroft.stop" <NODE_ID>

# Common Play (playback control)
hivemind-core allow-msg "ovos.common_play.play" <NODE_ID>
hivemind-core allow-msg "ovos.common_play.pause" <NODE_ID>
hivemind-core allow-msg "ovos.common_play.resume" <NODE_ID>
hivemind-core allow-msg "ovos.common_play.stop" <NODE_ID>
hivemind-core allow-msg "ovos.common_play.next" <NODE_ID>
hivemind-core allow-msg "ovos.common_play.previous" <NODE_ID>
hivemind-core allow-msg "ovos.common_play.player.status" <NODE_ID>
hivemind-core allow-msg "ovos.common_play.track_info" <NODE_ID>

# Optional: volume (PHAL ALSA plugin)
hivemind-core allow-msg "mycroft.volume.get" <NODE_ID>
hivemind-core allow-msg "mycroft.volume.set" <NODE_ID>
hivemind-core allow-msg "mycroft.volume.increase" <NODE_ID>
hivemind-core allow-msg "mycroft.volume.decrease" <NODE_ID>
hivemind-core allow-msg "mycroft.volume.mute" <NODE_ID>
hivemind-core allow-msg "mycroft.volume.unmute" <NODE_ID>

# Optional: SSH, Reboot and Shutdown (PHAL system plugin)
hivemind-core allow-msg "system.ssh.status" <NODE_ID>
hivemind-core allow-msg "system.ssh.enable" <NODE_ID>
hivemind-core allow-msg "system.ssh.disable" <NODE_ID>
hivemind-core allow-msg "system.reboot" <NODE_ID>
hivemind-core allow-msg "system.shutdown" <NODE_ID>
Step 9: Create a System Service
To keep HiveMind Player running in the background, add a systemd user service:
mkdir -p ~/.config/systemd/user/
nano ~/.config/systemd/user/hivemind-player.service
Paste this:
[Unit]
Description=HiveMind Player
After=network.target

[Service]
WorkingDirectory=/home/ark
ExecStart=/home/ark/.venv/bin/python /home/ark/.venv/bin/hivemind-core listen
Restart=on-failure

[Install]
WantedBy=default.target
Then enable and start it:
systemctl --user daemon-reload
systemctl --user enable hivemind-player.service --now
systemctl --user status hivemind-player.service
Step 10: Optional - Install tailscale for remote access
A problem we have with the R36S is that it changes IP address on every boot and randomizes its MAC address; to work around this we could try to assign a static IP address but since this is a handheld and will often be on the move, why not use a VPN?
tailscale is free and painless to install
curl -fsSL https://tailscale.com/install.sh | sh
sudo systemctl enable tailscaled
sudo tailscale login
sudo systemctl start tailscaled
sudo systemctl status tailscaled
Now we have a static ip address AND we can access the handheld remotely
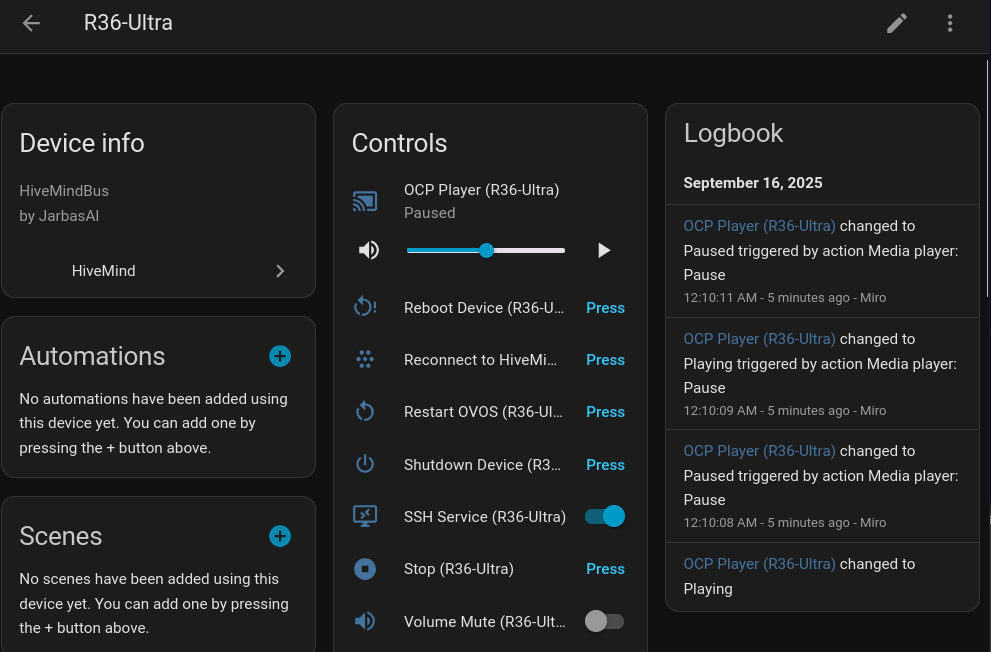
Step 11: Integrate with Home Assistant
With the hivemind-homeassistant integration installed, your R36 Ultra shows up as a media player inside Home Assistant.
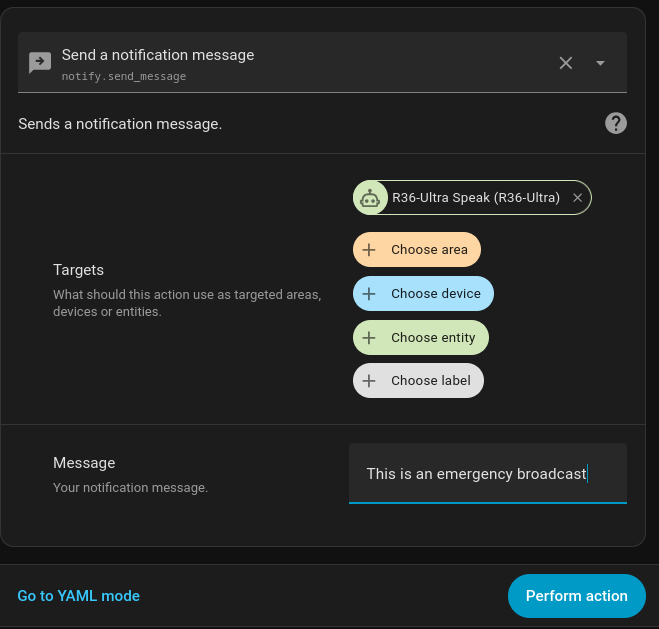
In Home Assistant, the TTS setup also makes the device available as a notify entity, so you can send text notifications and have them spoken on your R36 Ultra:
service: notify.hivemind_player
data:
  message: "Dinner is ready!"
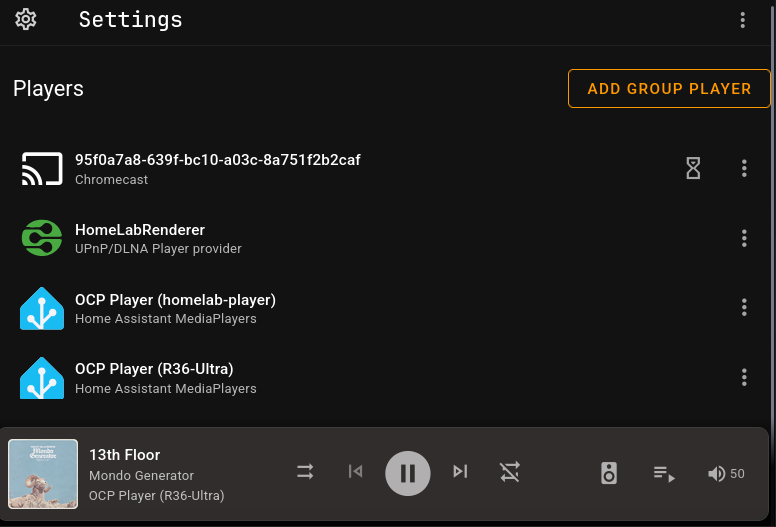
Combine this with Music Assistant and suddenly your retro handheld doubles as a WiFi speaker you can control from your smart home dashboard.
Wrap-Up
That’s it! My R36 Ultra, originally built for emulation, now runs HiveMind Player on ArkOS and integrates seamlessly with my smart home setup.
- HiveMind manages the player backend
- Home Assistant discovers it
- Music Assistant lets me browse and stream to it
ovos-audiomakes it flexible for both playback and TTS- Optional PHAL plugins give extra control (volume now, LEDs in the future)
- Permissions ensure only trusted clients can control it
A fun way to repurpose cheap handheld hardware into a smart speaker alternative! 🚀
Help Us Build Voice for Everyone
OpenVoiceOS is more than software, it’s a mission. If you believe voice assistants should be open, inclusive, and user-controlled, here’s how you can help:
- 💸 Donate: Help us fund development, infrastructure, and legal protection.
- 📣 Contribute Open Data: Share voice samples and transcriptions under open licenses.
- 🌍 Translate: Help make OVOS accessible in every language.
We're not building this for profit. We're building it for people. With your support, we can keep voice tech transparent, private, and community-owned.